Un-enrolling from Clevermore
If you'd like to stop using Clevermore, everything we added to your mailbox can be removed in a few minutes using built-in Outlook controls. This page walks through each step.
What Clevermore added to your mailbox
All Clevermore-managed items use emoji prefixes to make them easy to spot:
- Categories — priorities (🔴 Critical, 🟠 High, 🟡 Medium, ⚪ Low), classifications (📋 Complete, etc.), source (📨 General, 📨 Promotions, 📨 Social, 📨 Updates), and one 💼 category per client matter.
- Folders — one folder per client matter, grouped under a parent Clevermore folder in your mailbox.
- The add-in itself — installed into Outlook via the Microsoft 365 add-in framework.
- Azure AD app consent — permission granted to Clevermore to access your mailbox via Microsoft Graph.
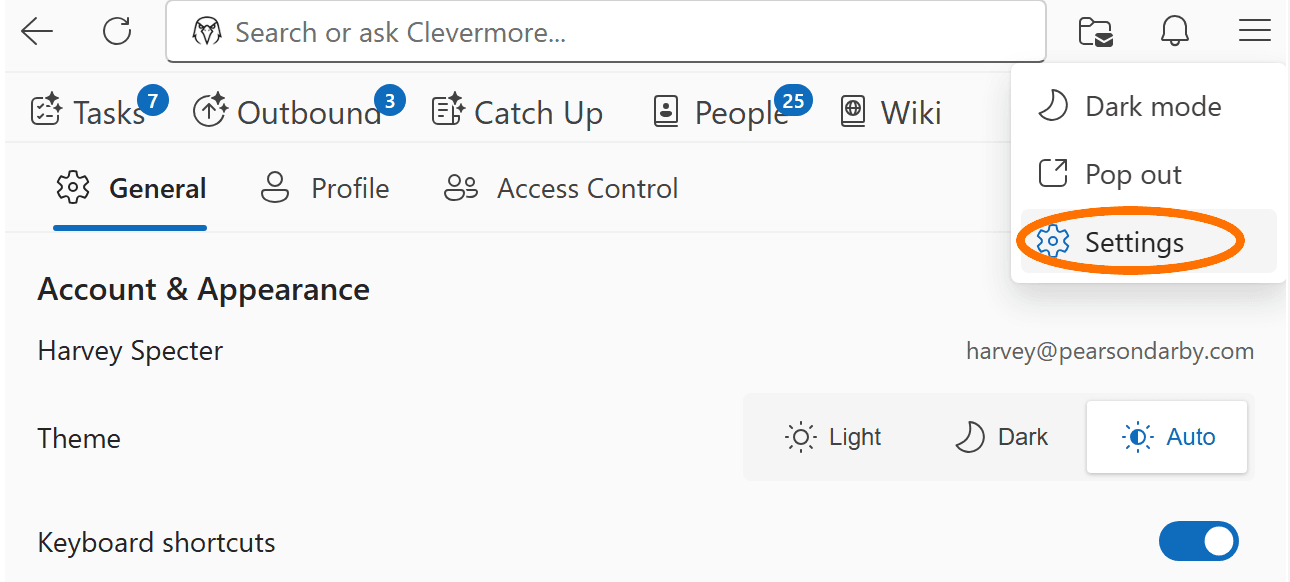
Step 1 — Open Clevermore Settings
Open the Clevermore taskpane in Outlook, click the overflow menu in the top-right corner, and choose Settings.
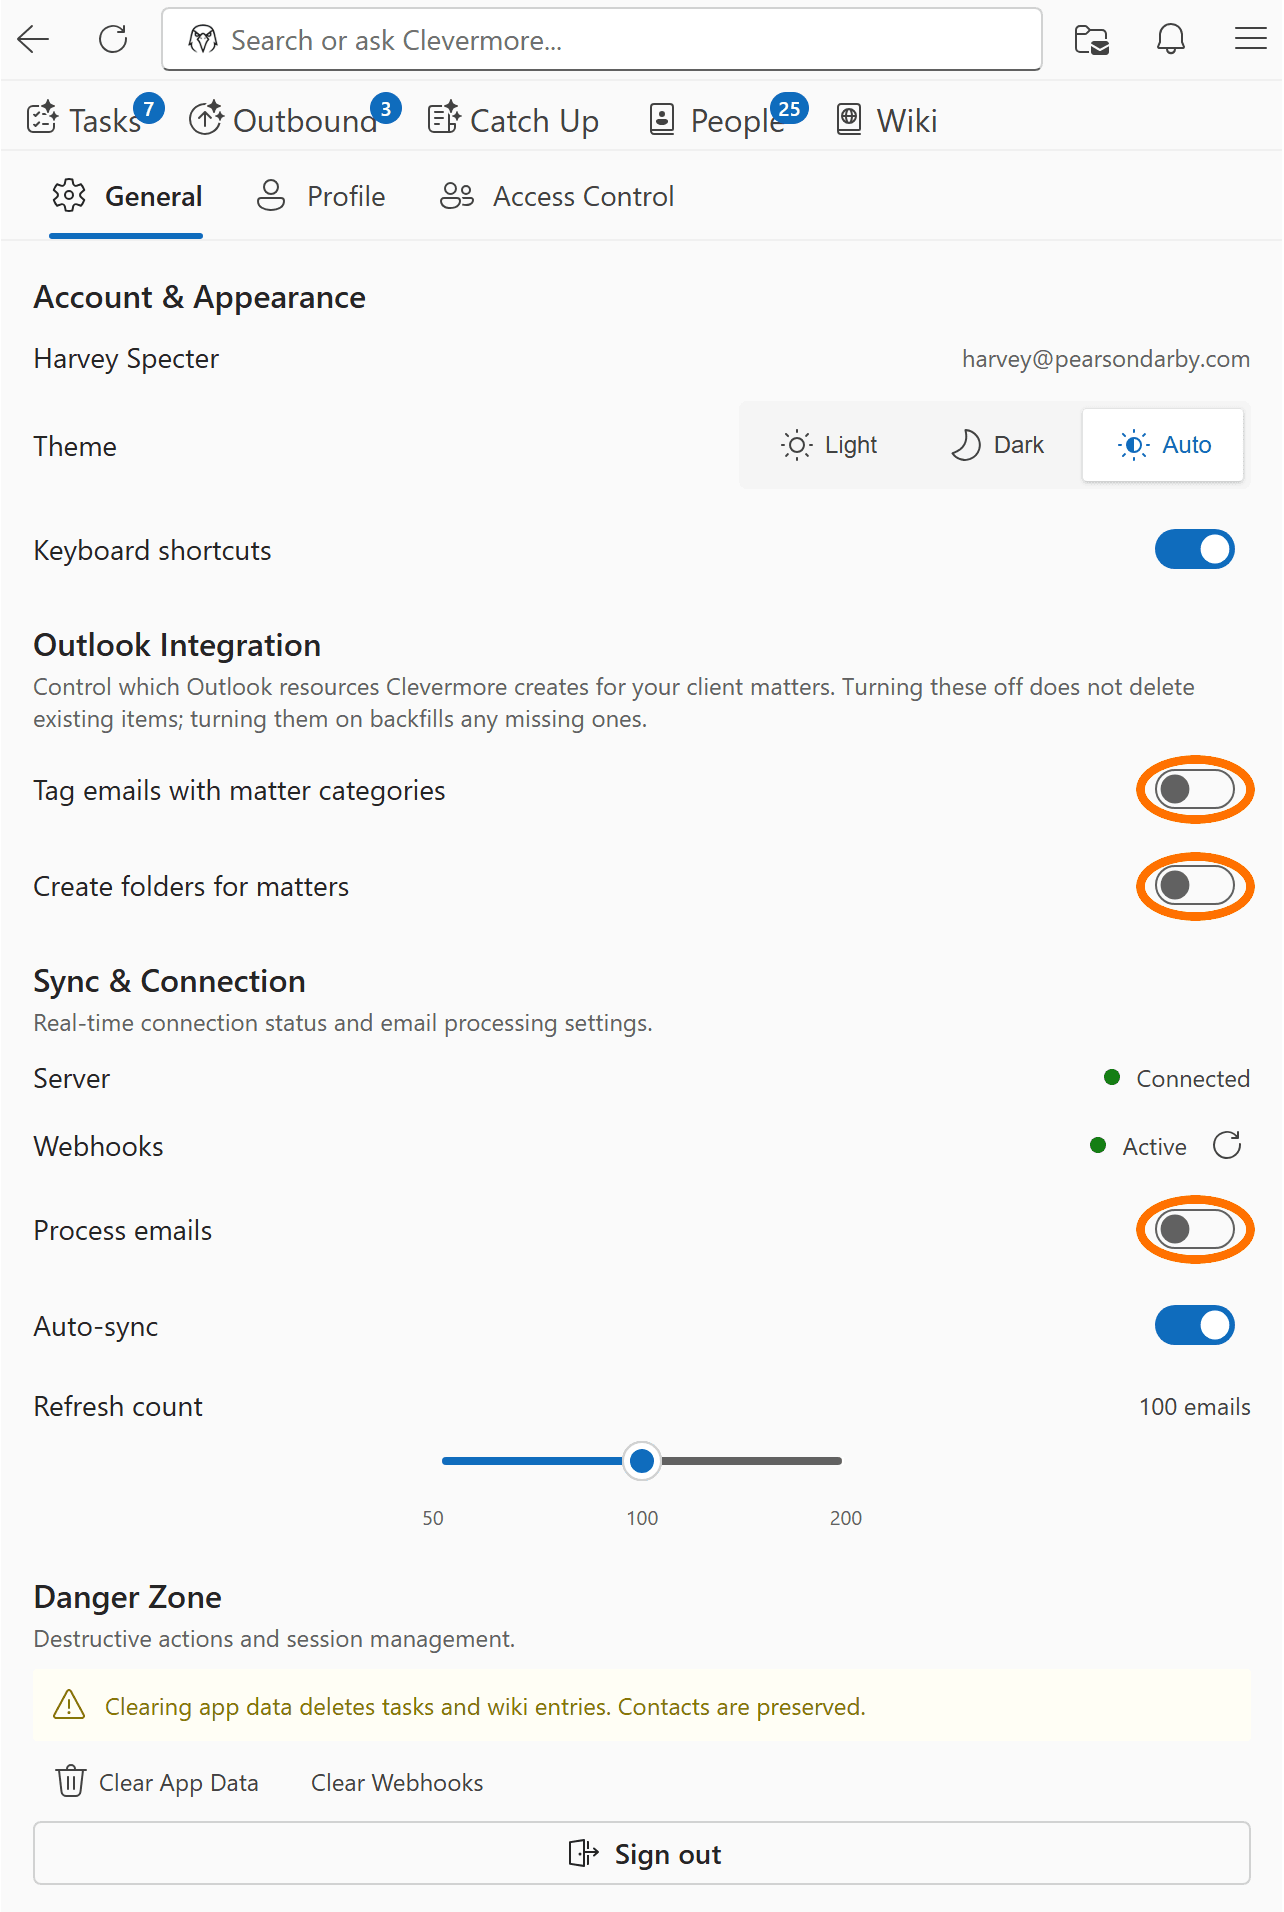
Step 2 — Turn off Clevermore's processing
Switch the three toggles below to off. Together they stop Clevermore from creating any new categories, folders, or task/wiki entries from incoming email. Existing items stay where they are — you'll remove those in the next steps.
- Tag emails with matter categories (Outlook Integration)
- Create folders for matters (Outlook Integration)
- Process emails (Sync & Connection) — the master switch
Just want to stop the category tags but keep using Clevermore? You don't have to un-enroll. Turn off only Tag emails with matter categories — Clevermore stops adding categories to new mail, while tasks, people, and your wiki keep updating in the background.
Optional — the Danger Zone
Scroll to the bottom of the same Settings page to find the Danger Zone. To sever Clevermore's connection to your mailbox right away, click Clear Webhooks — it removes the Microsoft Graph subscription on the spot, so Clevermore stops being notified of new mail. This is optional: with the three toggles above off, nothing is processed even while the subscription technically still exists.
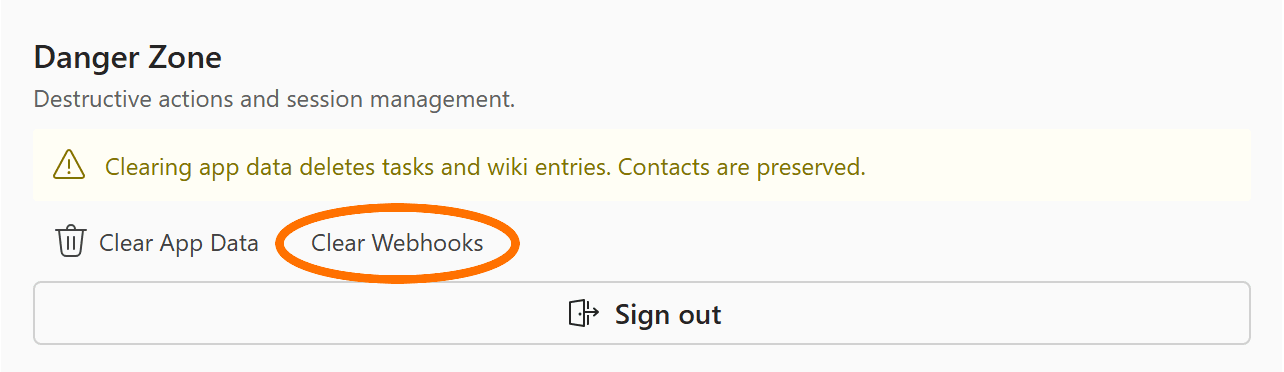
The Danger Zone also has Clear App Data, which deletes the tasks and wiki entries Clevermore generated for you (your contacts are preserved). You don't need it to un-enroll — the steps below clear everything from your mailbox — but it's there if you want a clean slate.
Step 3 — Remove Clevermore categories
Clevermore's categories are the ones whose names begin with an emoji — 🔴 🟠 🟡 ⚪ for priority, 📋 for classification, 📨 for source, and 💼 for each client matter. Categories withoutan emoji prefix are your own or Outlook's defaults, so leave those alone. If your category list looks cluttered, that emoji prefix is how to tell Clevermore's apart.
When you delete a category from Outlook's master category list, Outlook automatically removes it from every message it was applied to. This is the fastest way to clear both the categories and the message tags in one pass.
Outlook on Windows (Classic)
- On the Home ribbon, click Categorize → All Categories…
- Select every category whose name starts with 🔴, 🟠, 🟡, ⚪, 📋, 📨, or 💼.
- Click Delete and confirm.
Outlook on the web / new Outlook
- Open Settings (gear icon) → General → Categories.
- For each category starting with one of the emoji prefixes above, click the trash icon to delete it.
To clear the colored tags off a few specific messages without deleting the category definitions, select those messages, right-click, and choose Categorize → Clear All Categories. Deleting the categories from the master list (above) is the thorough route that clears everything at once; this is the quick way to tidy up a handful of emails.
Step 4 — Remove Clevermore folders
Folders only exist if Create folders for matters was ever turned on. If you don't see a Clevermorefolder in your mailbox, there's nothing to remove here — skip to Step 5.
Clevermore creates a Clevermore folder in your mailbox with one sub-folder per client matter. Any messages filed there are still yours — if you want to keep them, move them out before deleting the folder.
- In your folder list, locate the Clevermore folder.
- Right-click the folder and choose Delete folder. This removes the parent and every matter folder underneath in one step.
- Empty Deleted Items if you want the messages purged permanently.
Step 5 — Remove the add-in
If Clevermore was installed by your IT administrator (a centralized deployment), only an admin can remove it — skip ahead to Step 6 and ask your admin to uninstall the add-in for your account. If you sideloaded it yourself:
- In Outlook, open Get Add-ins (or All Apps in new Outlook).
- Open the My add-ins tab.
- Find Clevermore, click the … menu, and choose Remove.
Microsoft's full guide is at support.microsoft.com.
Step 6 — Revoke Azure AD app permissions
This severs Clevermore's ability to read or modify your mailbox via Microsoft Graph. After this step, Clevermore can no longer connect to your account even if the add-in is still installed.
- Visit myaccount.microsoft.com and sign in with your work account.
- Open Privacy → App permissions.
- Find Clevermore in the list and click Revoke permissions.
If your IT administrator granted consent on behalf of the entire organization, you may not see Clevermore in this list — in that case, ask your admin to remove the enterprise application from your Azure AD tenant.
What stays on Clevermore's servers
The steps above remove every visible trace of Clevermore from your mailbox. The tasks, contacts, and settings Clevermore generated for you remain on our servers so you can re-enroll later without losing context. Want that data deleted from our side too? Yes — just email support@clevermore.ai with the account, and we'll purge it from your firm's deployment.
Re-enrolling later
To start using Clevermore again, reinstall the add-in and sign in. If your account data is still on file, your tasks and contacts will reappear automatically. For help, contact support@clevermore.ai.
For IT administrators
The steps above are per-user. To roll Clevermore out (or back) across your organization, use the Microsoft 365 Admin Center to deploy or remove the add-in, and the Microsoft Entra admin center to manage tenant-wide consent. Contact support@clevermore.ai for guidance on org-wide rollback, including any data still held in your deployment.