Getting started
A walkthrough of Clevermore's first-run experience. Onboarding takes about five minutes and the steps below show what to expect on each screen.
What is Clevermore?
Clevermore is a Microsoft 365 add-in for Outlook, built for lawyers. It reads the email threads in your inbox, pulls out action items as tasks, and builds a running profile of your clients, matters, and the people you work with — all without you having to file, tag, or summarize anything by hand.
You’ll see three main things inside the taskpane:
- Tasks — to-dos that Clevermore extracted from your email, grouped by client matter.
- People — contact profiles that grow as new emails arrive, so you always have context on who someone is and what you’re working on with them.
- Wiki — a per-matter knowledge base that captures key facts, decisions, and history from the email trail.
The add-in is deployed by your firm’s IT administrator. The steps below assume it’s already available in your Outlook ribbon. If you can’t find it, the deployment may still be propagating — wait a few minutes and restart Outlook, or contact your administrator. New here? Skim the glossary at the bottom of this page first.
See it in action
A short loop of Clevermore at work: tasks being created from incoming email, and messages being tagged with the right client matter so they’re easy to find and file later.
Step-by-step walkthrough
Seven screens, about five minutes from start to finish.
Step 1 — Open Clevermore from the Outlook ribbon
Open Outlook and find the Clevermore button on the far right of the Home ribbon, under the Add-in section. Click it to open the dropdown, then click Home to open the taskpane.

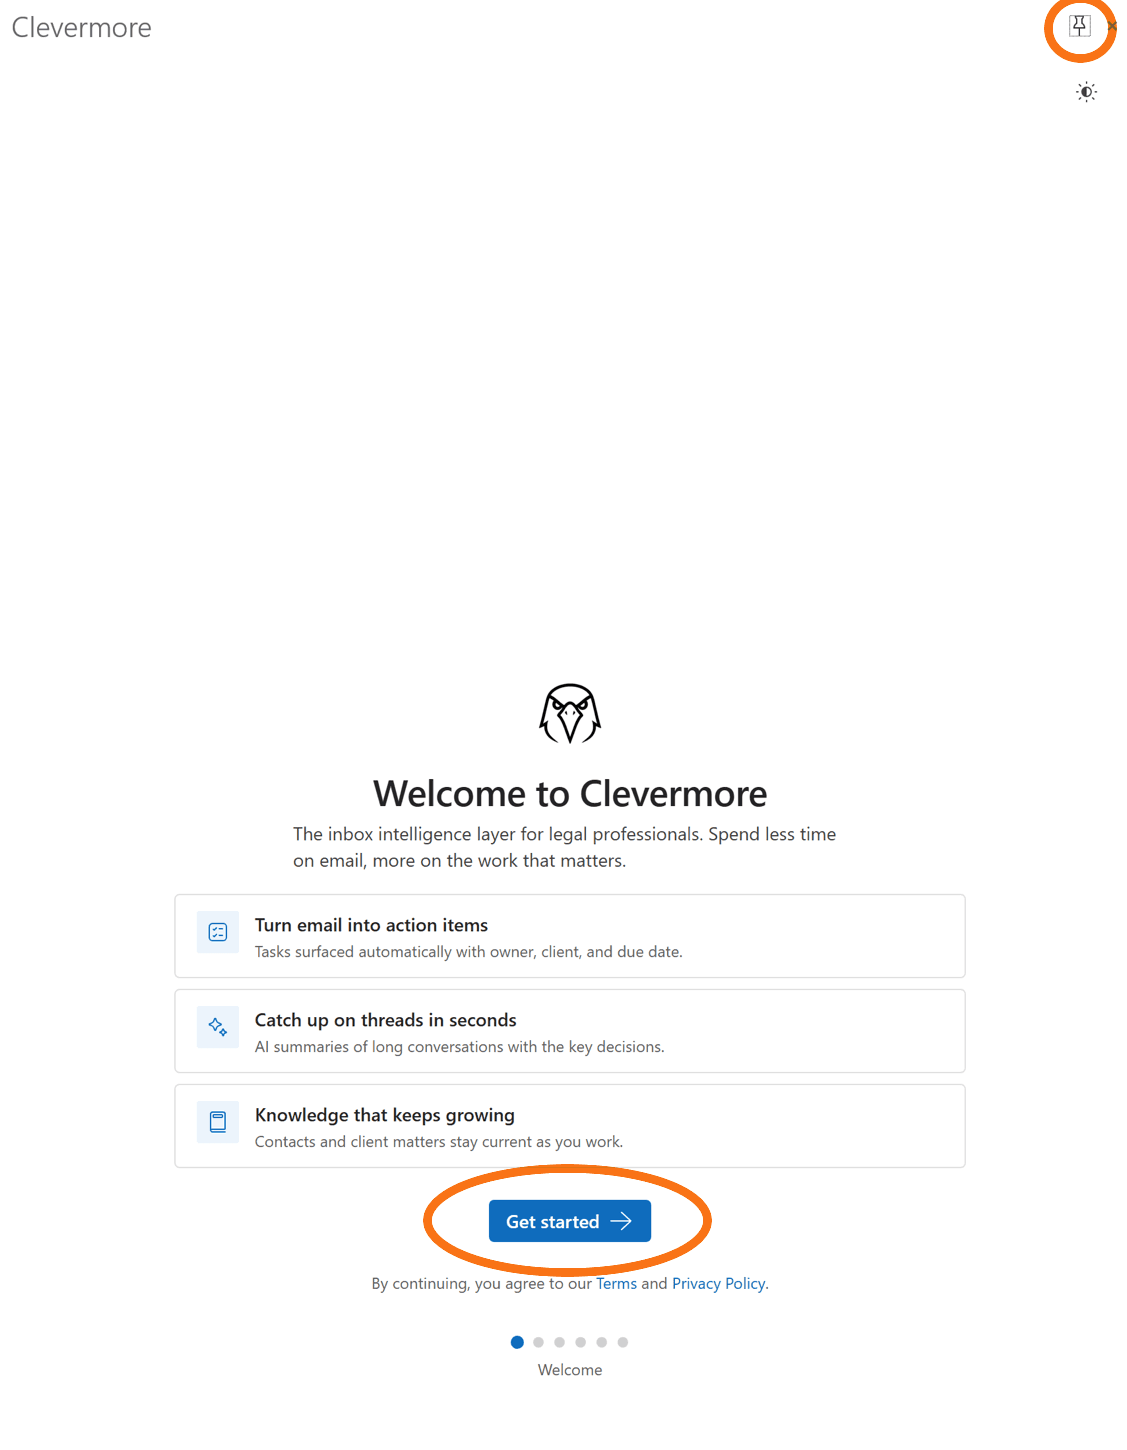
Step 2 — Pin the taskpane, then click Get started
We recommend pinning the Clevermore taskpane (pushpin icon, top right) so it stays open as you move between emails — otherwise Outlook closes it every time you switch messages and you’ll lose your place. With the pane pinned, click Get started to begin onboarding.
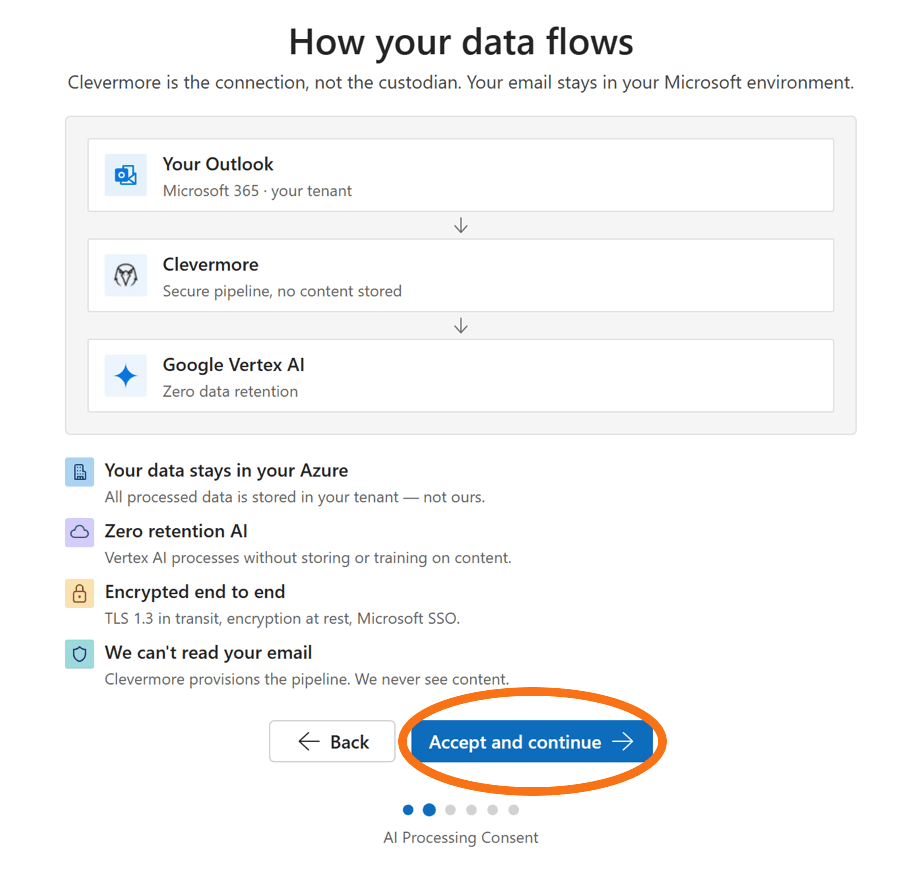
Step 3 — How your data flows
Clevermore processes your email through Google Vertex AI (Google’s enterprise AI platform — see glossary below) with zero data retention: nothing is stored on Google’s side, and the data we keep stays inside your firm’s Azure tenant. Review the consent details, then click Accept and continue.
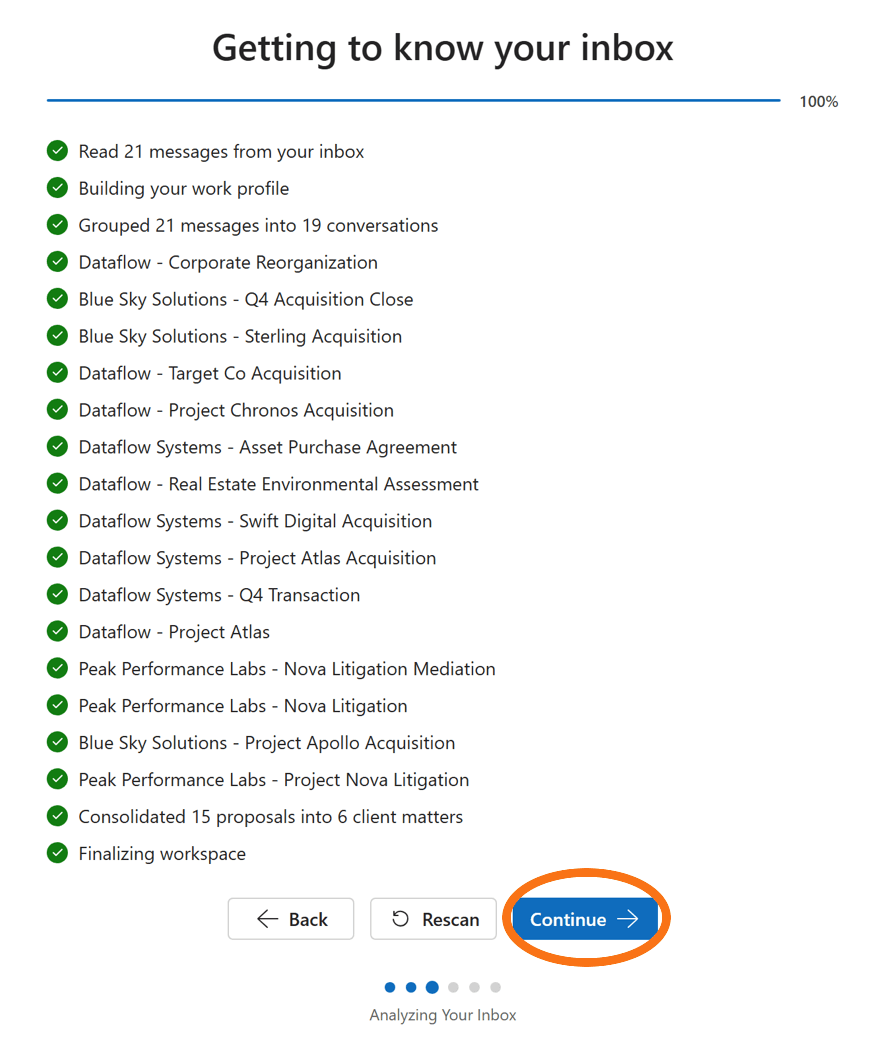
Step 4 — Getting to know your inbox
Clevermore scans your recent email to detect client matters, teammates, and your role. This typically takes a minute or two depending on inbox size. The Continue button becomes active once the scan finishes — wait for the progress bar to hit 100%, then click Continue.
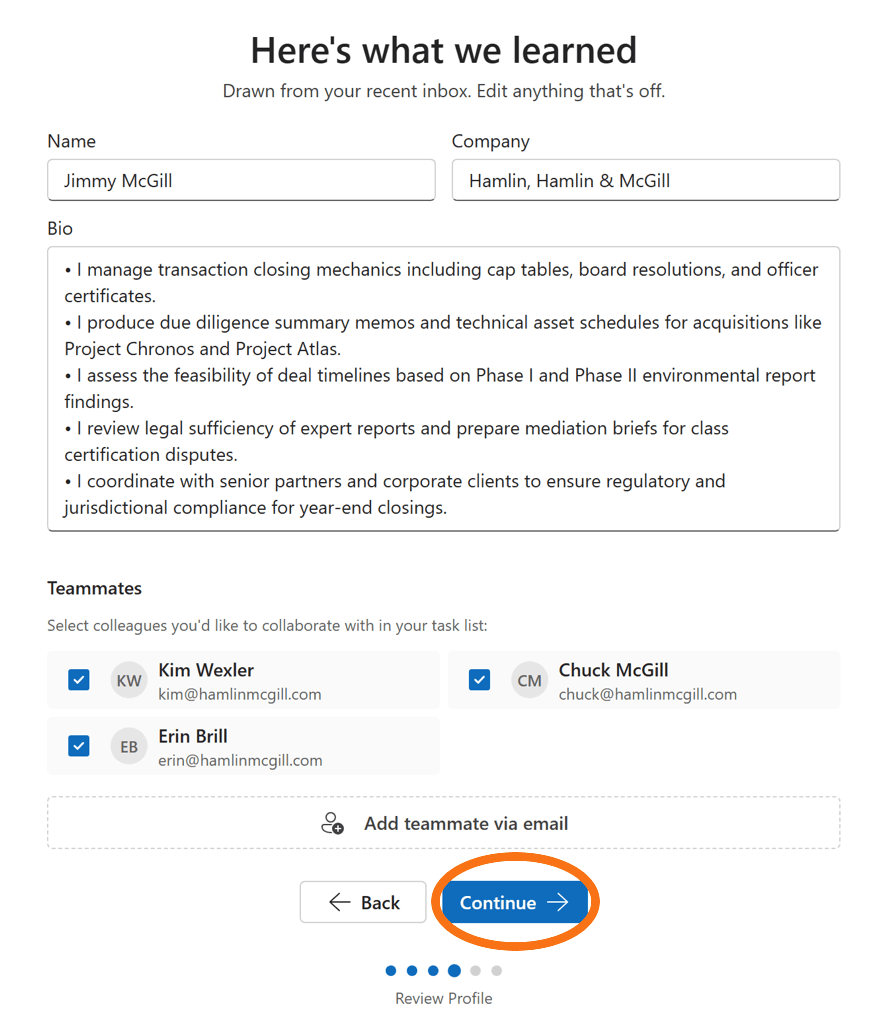
Step 5 — Here’s what we learned
Clevermore drafts a profile of your role and surfaces the colleagues it noticed working with you most often. Edit anything that’s wrong, deselect any teammates you don’t want to share tasks with, then click Continue.
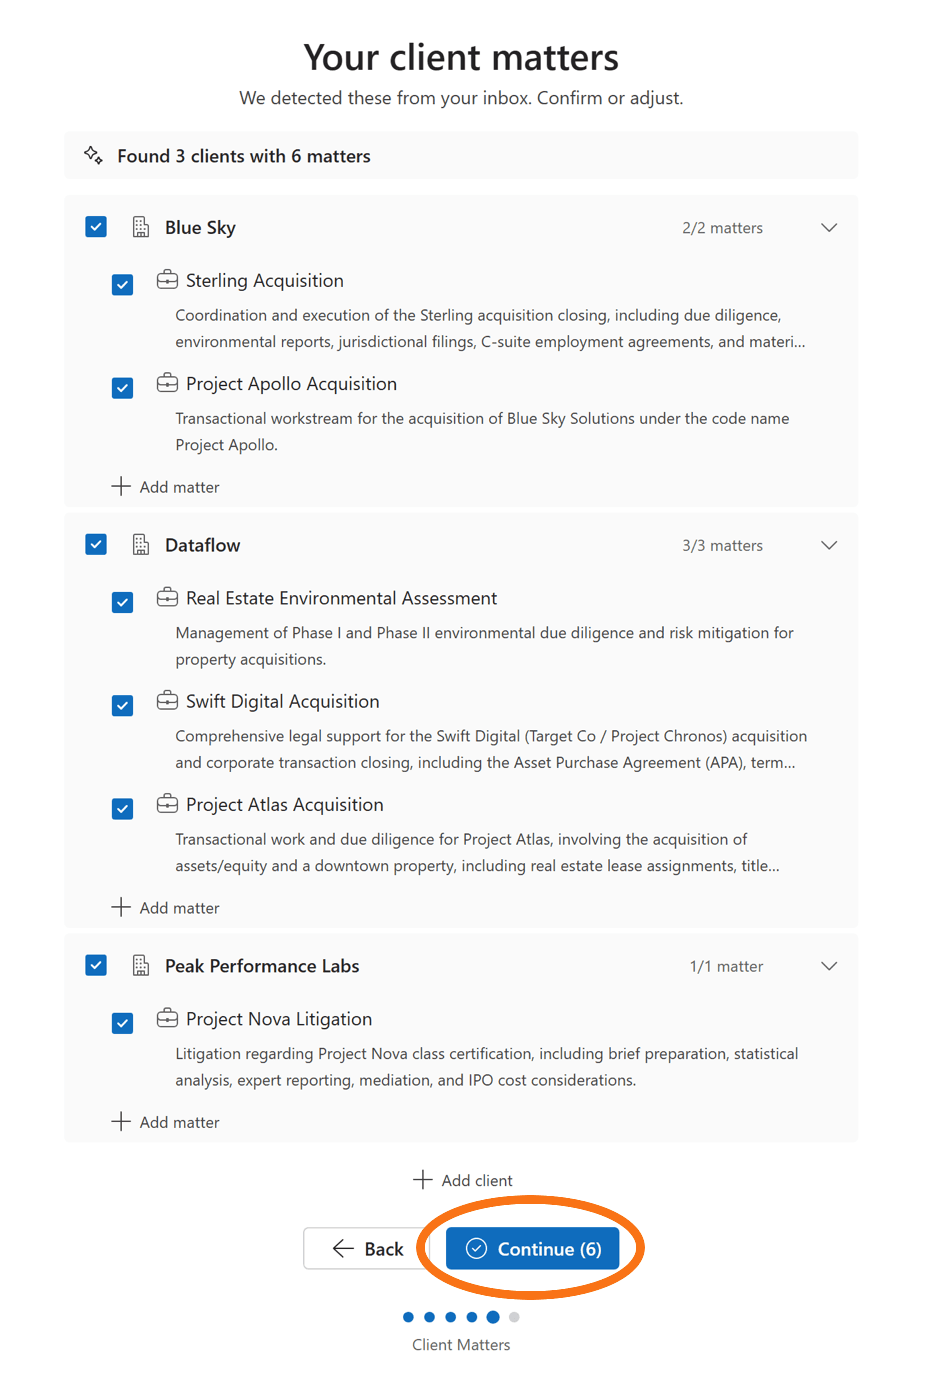
Step 6 — Your client matters
Review the client matters Clevermore detected in your inbox. Uncheck anything you don’t want tracked, add anything that was missed, then click Continue.
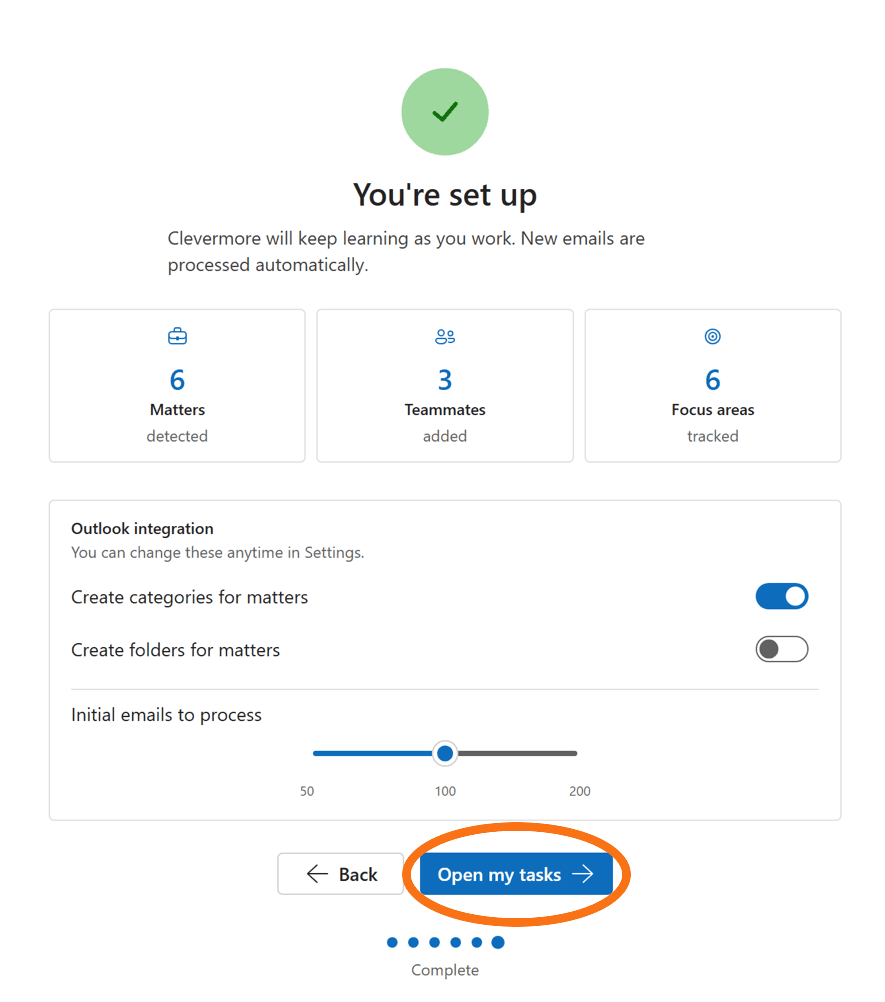
Step 7 — You’re set up
Last step — choose whether Clevermore should create Outlook categories and folders for your matters, and how far back to look in your inbox for the initial pass. You can change all of these later in Settings. Click Open my tasks to land in your new task list.
What happens next
From here on, Clevermore keeps working in the background. As new email arrives, it surfaces tasks, updates contact and matter profiles, and adds to your wiki (the per-matter knowledge base — see glossary) — no further action required. Open the taskpane anytime to see what’s changed.
If anything looks off, see Troubleshooting or email support@clevermore.ai.